Showing posts with label Sharepoint Turorials. Show all posts

Monday, 29 October 2012

List of New WebParts Introduced in SharePoint 2013


No comments:
Serach WebParts
- Content Search Web Part (CSWP)
- Articles
- Catalog-Item Reuse
- Items from a Catalog
- Items Matching a Tag
- Pictures
- Popular Items
- Recently Changed Items
- Recommended Items

Blog: - Blog Archives
- Blog Notofications
- Blog Tools

Community:
- About this comminity
- Join
- My membership
- Tools
- What's happening

Document Sets:
- Document Set Contents
- Document Set Properties

Tuesday, 12 June 2012

How to Configure Auditing in Office 365 SharePoint Online sites


1 comment:
I was asked about "How to Configure Auditing in Office 365 - SharePoint Online sites" today and I reliased that I had never cared about audidting in our SharePoint Online sites.  since I write a lot of How to's here I though lets write another one. So here are the steps to Configure Auditing in Office 365 SharePoint Online sites.

Steps to Configure Auditing in Office 365 SharePoint Online sites -

1. Login to Office 365 SharePoint Online site.
2. Navigate to Site Actions -> Site Settings
3. Under Site Collection Administration select Site collection features.
4. Scroll down until you find Reporting and select Activate.

5. Next go to Site Actions -> Site Settings -> under Site Collection Administration select Site collection audit settings.


6. In specify "Audit Log Trimming ", events that needs to be audited in "Documents and Items" and events that needs to be audited in "Lists, Libraries, and Sites "

7. Next go to Site Actions -> Site Settings -> under Site Collection Administration select Audit log reports.


8. Next Select the Report that you need to generate for this example I will select "Content type and list modifications" for this example.  More about kind of Reports

9. When you select the report you will taken to File Location page. This is where you choose the library where this report will be saved. I have selected Shared Documents where I need these reports saved.

10. Once the report is generated you see a dialog like below.

Monday, 21 May 2012

How to add Jquery to your SharePoint site, SharePoint Online - Options


No comments:

Various Options to user Jaquery in your SharePoint or SharePoint Online site.

Option 1 -You can use the JQuery library hosted on Microsoft’s content delivery network (CDN). The CDN geographically distributes the fi le around the world, making it faster for clients to download the file. With SharePoint on-premise installations, such as your intranet, this is not as important, but with SharePoint Online or SharePoint-based Internet sites, this will increase the perceived performance of your site.

Add the following script tag to your page to use the Microsoft CDN to load the jQuery library.

<!-- <script src="http://ajax.microsoft.com/ajax/jquery/jquery-1.4.2.min.js" type="text/javascript"> </script> -->

Option 2 -  The next approach is to use the ScriptLink control.Add the following ScriptLink server-side tag to your page to load the jQuery library.
<!-- <sharepoint:scriptlink defer="false " id="SPScriptLink " localizable="false " name="jquery-1.4.2.js " runat="server"></sharepoint:scriptlink> -->

Few things about ScriptLink control -

* The ScriptLink control ensures that the script is loaded only once and will also ensure that other dependencies have been loaded first

* The ScriptLink control requires that you put the jQuery library file in the LAYOUTS directory, C:\Program Files\Common Files\Microsoft Shared\Web Server Extensions\14\TEMPLATE\LAYOUTS.

* Cannot be used with sandboxed solutions.

Option 3 -The third method, and the one that you should use, is to load jQuery using the Microsoft Ajax script loader, or another client-side script loader. You will need to download the Start.js library to your Site Assets library’s Script folder to hold your scripts. You can find the current script loader on Microsoft’s CDN at the following URL. http://ajax .microsoft.com/ajax/beta/0910/Start.js.

You should also download the source version for development from the following URL. http://ajax.microsoft.com/ajax/beta/0910/Start.debug.js. Alternatively, you could load the Start.js library directly from the Microsoft CDN. There are two steps to loading the jQuery library, or any of your custom JavaScript libraries. * First, reference the script loader on your page using the following script tag. Or, if you are loading the library from the CDN, use the following script tag instead. <!-- <script src="http://ajax.microsoft.com/ajax/beta/0911/Start.js " type="text/javascript"> </script> --> * The second step is to reference the jQuery library or your own libraries using the Sys.loadScripts method, which is part of the Start.js library. The Sys.loadScripts method takes an array of scripts to load and a callback function to call when they have been loaded. Add the follow code to load the jQuery library. <!--<script type="text/javascript "> Sys.loadScripts(["/SiteAssets/Scripts/jquery-1.4.2.js "], function() { alert("jQuery Loaded "); }); </script> --> * The second step is to reference the jQuery library or your own libraries using the Sys.loadScripts method, which is part of the Start.js library. The Sys.loadScripts method takes an array of scripts to load and a callback function to call when they have been loaded. Add the follow code to load the jQuery library. Sys.loadScripts(["/SiteAssets/Scripts/jquery-1.4.2.js "], function() { alert("jQuery Loaded "); });

Saturday, 19 May 2012

How to use Site Aggregator WebPart in Sharepoint 2010, SharePoint Online and Office 365


1 comment:
A lot of questions and errors about Site Aggregator WebPart in Sharepoint site. I thought of writting a wutorial which btw I implemented on a SharePoint Online - Office 365 site.

What is Site Aggregator WebPart  - This webpart displays all the docuemnts created or modified by the users from various sites in a Site collection. You have to add the sites as Tabs to see the documents in thoes sites under that Tab.

Lets look at the steps.

1. Add the Webpart Site Aggregator to the SharePoint Site page.


2. Click on "Add a New Tab" to add an entry for new site.


3.  Once you click add new tab you would be presented with options to add URL and name of the Site from where you need to pull in the information.

Site Url - This can be any site siblling site or subsite of the current site. Only thing to keep in mind is that the site should be in same site colletcion.


4.  Next Create the Tab and you should see something like below.


If you get an Error something like "404 NOT FOUND " or you see your site below your tab Instead of documents then read my Post 404 NOT FOUND on Site Aggregator WebPart SharePoint

Monday, 14 May 2012

How to escape Restrictions on Sandbox Solutions in SharePoint


No comments:
In addition to my previous tip about How to Disable Sandbox Solutions on your SharePoint site I would like to Share another tip about how to escape Restrictions on Sandbox Solutions in SharePoint.

Override Sandbox Restrictions - There are two major ways that a sandboxed solution can escape the usual restrictions.

1. Using Client-side code - To access the resources that are not available from server-side code in a sandboxed solution you can use the client-side object model available. The benefit of using this object model is that there are no code execution restrictions, no resource access restrictions, and no resource usage restrictions.
2.  Full trust proxy (SPProxyOperation) - The sandboxed solutions architecture also enables a technique by which a sandboxed solution can call custom operations that run in full trust. The technique requires that a farm solution be developed that includes one or more classes that derive from
SPProxyOperation. Each of these defines an operation that will run in full trust and can be called from sandboxed solutions by means of the ExecuteRegisteredProxyOperation method. Specifically, these full trust proxy operations execute in the same proxy process (SPUCWorkerProcessProxy.exe) in which the standard Microsoft.SharePoint.dll assembly runs. The proxy operations can return data to the sandboxed solution.
 
Check the Example here to Create a Full-Trust Proxy Operation.


How to Disable Sandbox Solutions on your SharePoint site


No comments:
What if you dont want your developers to add Sandbox Solutions in your SharePoint site or in your Office 365 site or If you just want to restict Sandbox Solutions to one Site colletcion or one web server. I will list out options to do just that. Lets look at the Options.

1. Restict Sandbox Solutions on a Site Collection - Sandboxed solutions can be enabled or disabled on specific site collections by adjusting their quotas. If you set the quota for sandboxed solutions to 0 on a specific site collection, sandboxed solutions will not run on that site collection. In this manner you can fine-tune the use of sandboxed solutions in your farm. You can do this in Central Admin -> Quota Templates. Create a Site Colletcion Quota and In "Sandboxed Soltuions with Code limits" set Limit maximum usage per day to 0.

Click On Image to see in Full Screen Mode.


2. Disable Sandbox solution on a server - You can decide to run sandboxed solutions only on certain servers in your SharePoint Server farm or on all servers. To enable sandboxed solutions on a server, you must enable the sandboxed solutions service. This service must be enabled on every server on which you want to run sandboxed solutions on. So if you want to restict Sandbox solutions on a Server you would just disable Microsoft SharePoint Foundation Sandboxed Code Service on that server.

Thursday, 10 May 2012

How to apply Custom xsl to Listviewwebpart Sharepoint 2010


2 comments:
A basic tutorial about applying a Custom XSL file. I am writting this because  I get this question almost every week from my team of developers.

So here you go

1. Add a Listview Webpart to your Page.

2. Create a XSL file.

For your refrence here is an XSL file that you can use on your Tasks list. This XSL will convert Status column to graphical buttons.

<xsl:stylesheet xmlns:x="http://www.w3.org/2001/XMLSchema" xmlns:d="http://schemas.microsoft.com/sharepoint/dsp" version="1.0" exclude-result-prefixes="xsl msxsl ddwrt" xmlns:ddwrt="http://schemas.microsoft.com/WebParts/v2/DataView/runtime" xmlns:asp="http://schemas.microsoft.com/ASPNET/20" xmlns:__designer="http://schemas.microsoft.com/WebParts/v2/DataView/designer" xmlns:xsl="http://www.w3.org/1999/XSL/Transform" xmlns:msxsl="urn:schemas-microsoft-com:xslt" xmlns:SharePoint="Microsoft.SharePoint.WebControls" xmlns:ddwrt2="urn:frontpage:internal" xmlns:o="urn:schemas-microsoft-com:office:office">
 <xsl:include href="/_layouts/xsl/main.xsl"/>
 <xsl:include href="/_layouts/xsl/internal.xsl"/>
 <xsl:template name="FieldRef_body.Status" match="FieldRef[@Name='Status']" mode="body">
  <xsl:param name="thisNode" select="."/>
   <xsl:choose>
    <xsl:when test="$thisNode/@*[name()=current()/@Name] = 'Completed'">
     <img src="/_layouts/images/IMNON.png" alt="Status: {$thisNode/@Status}"/>
    </xsl:when>
    <xsl:when test="$thisNode/@*[name()=current()/@Name] = 'In Progress'">
     <img src="/_layouts/images/IMNIDLE.png" alt="Status: {$thisNode/@Status}"/>
    </xsl:when>
    <xsl:otherwise>
     <img src="/_layouts/images/IMNBUSY.png" alt="Status: {$thisNode/@Status}"/>
    </xsl:otherwise>
   </xsl:choose>
<script type="text/javascript">
alert("hi");
</script>
 </xsl:template>
</xsl:stylesheet>

The Task list with above XSLT will look like below

3. Next upload the XSL file in your site's Asserts library.

4. Now Navigate to your Tasks list and Edit the Page. click on Edit Webpart properties of Task list webpart and add the relative path of your XSL (that you uploaded in Step 3) in XSL link property. See below
Once you apply you would see the task list with Graphics in Status column. But hold on there is a bug in here. If you use XSL property to style your list make sure you aren't using the ECB menus on task item. Using XSL link breaks the ECB menu. See this post for more options.

Saturday, 28 April 2012

All about Recycle bin in SharePoint Online - II


1 comment:
In the previous post we discussed about types of Recycle bin and User Recycle bin features in detail. In this post however, we will look at Site Collection Level Recycle Bin and SharePoint Administration Center Recycle Bin.

Site Collection Level Recycle Bin - According to this post, here are some basic features that you need to know -
  • Available to you if you have the Site Collection Administrators role.
  • When you delete an item from users recycle bin, it will be moved to the second stage Site Collection recycle bin. It stays there until a site collection administrator deletes it or its automatically deleted after a number of days (up to 30).  
  • Items deleted from the second recycle bin is not recoverable.
  • Items located in the second stage doesn’t count towards the Site Collection Quota. Well this is a great news.
  • When you restore the file from the Site Collection Recycle Bin it gets restored in the original location.
SharePoint Administration Center Recycle Bin - The SharePoint Online Administration Center Recycle Bin gives you greater control over deleted site collections by allowing you to restore a site collection without having to contact Office 365 support. Features that you need to know -
  • Deleted site collections stay in the Recycle Bin for 30 days before they are automatically permanently deleted.
  • Site Collections are restored only if a new site collection with the same URL does not exist, and storage and usage quotas have not been exceeded. Infact, If you try to create a new site collection that uses the same URL as a site collection that is in the Recycle Bin, you will be prompted to permanently delete the site collection in the Recycle Bin before you can proceed.If your usage quota or storage quota are at their limit, you need to either create the needed space by deleting unused items or increase the limit.

All about Recycle bin in SharePoint Online


No comments:
A the title says the post is All about Recycle bin in SharePoint Online. Recycle bin becomes a very important component when you delete a document in your SharePoint Online site. Lets look at various Recycle Bin's and options to recover documents, items, pages, sites and site collections that were deleted by the user.

Breif Summary - When a user deletes a document it goes into first stage Recycle Bin or user's Recycle Bin. When a document gets deleted from user's Recycle Bin it goes into second stage Recycle Bin, also known as Site Collection Level Recycle Bin. Once a user deletes a document from Site collection Bin it gets permanetly removed from the site.
The case of deleting Site collection however is a bit different, SharePoint provides an additional third layer Recycle bin i.e "SharePoint Administration Center Recycle Bin" which will save any site colletcion deleted by administrator for 30 days, only in Enterprise plans.

Before we begin here are the following data types are captured by the Recycle Bin:
  • Site Collections
  • Sites
  • Lists
  • Libraries
  • Folders
  • List items
  • Documents
  • Web Part pages
and the following data types are not captured by the Recycle Bin:
  • Site customizations made through SharePoint Designer 2010
 Lets go in-depth into the Recycle bins.

1. User Recycle bin - According to this post,here are some basic features that you need to know -

* Accessible from the "Recycle Bin" link on the Quick Launch bar at the top level or sub site level.
* Available to you if you have Contribute, Design, or Full Control Permissions.
* When you delete an documnet or item in the list/library it gets moved to the User recycle bin. It stays there until it is either deleted by you, another user with permissions or automatically deleted after 30 days.
* You can restore the item from the recycle bin or permanently delete the item from the recycle bin.
* Items located in this bin counts towards the Site Collection Quota.For ecxamoke if you delete a document of 1Gb and it sits in your User Recycle bin, it will not free up the space that is alloted to your site unless it is permanently deleted.

Next we will look at Site Collection Level Recycle Bin and "SharePoint Administration Center Recycle Bin" >>

Wednesday, 25 April 2012

How to add a sandbox webpart or solution in your SharePoint site


No comments:
A simple tutorial on how to add a sandbox soltuion in you SharePoint online or SharePoint 2010 site.

1. Download the solution (mostly would be a wsp package)

2. Navigate to Site Actions -> Site Settings -> Solutions Gallery.


3. Next upload solution in Solutions gallery.


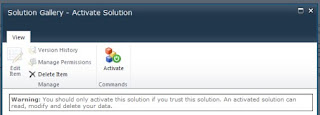
4. Once the solution is uploaded you need activate it in order to use it.


5. Once you activate the solution you can add it in an existing page or a new webpart page.

6. Edit the page and click on "Add a WebPart" in webpart zone. From the create window (or insert tab on the top) select custom and then your webpart. click Add to add it to the page. This will add the solution on the page.

Friday, 20 April 2012

How to add multiple users in office 365


No comments:
Adding Multiple Users in Office 365 is as simple as anything else in Office 365 suite.

All you have to do is upload a data file mainly CSV file with all the users under Bulk add users.

To add multiple users all at once, follow these steps:

1. In the header, click Admin.

2. In the left pane, under Management, click Users.

3. Click New, and choose Bulk Add Users.

4. In the Bulk Add Users page, click the Browse button to open the Choose File To Upload dialog box.

5. Navigate to the folder the CSV file you want to use and upload.

Note - *Click Download a blank CSV file to create a CSV file using the template provided.

Do not add, change, or delete column labels in the CSV template or sample file, and make sure that you save the file with a .csv extension, or the file may not upload correctly.

After Office 365 uploads the file, the user names are verified to ensure that all information is ready to use. The verification screen shows you which information is passed and which produced errors. You can view any errors produced by clicking the View link in the Log File category.

After bulk-adding new users, you will be taken to Set Sign-in Status option, where you choose to allow or block access to Office 365 services by the user. If you bulk-add new user accounts before employees are ready to use these accounts, you can choose Deny to keep the accounts inactive. Then when an employee is ready to use an account, you can change the sign-in status from Blocked to Allowed.

Thursday, 22 March 2012

How to use a webpart property in Ecmascript or Javascript client object model in SharePoint 2010


No comments:
Here is a short tip about how to use a webpart property in your Ecmascript or Javascript client object model in your sandbox or visual webpart.

If you need a tip about how to create a custom editorpart toolpart see my Post Create custom EditorPart for Sandbox webpart - SharePoint 2010. So while working with this in my sandbox webpart i had a requirenment to consume the webpart property from my custom editorpart in Javascript client object model.

So here is how you do it -
If your webpart property is for getting a list name below is how you use it in your ecmascript.

var ListName = '<%=taskList%>';

tada!

Thursday, 19 January 2012

How to ghost your custom layouts master and aspx pages in sharepoint


No comments:
Here is another quick tip on How to ghost your custom layouts master and aspx pages in sharepoint.
While deploying your files like custom Layout Page, Master Page or custom aspx page you might choose to use the available module element. The module element contains <File> tags which specifies the location\URL of the file being deployed. This tag has some additional options to tell Sharepoint if the resource being added is Ghostable or not.

Ghostable and Ghostableinlibrary - Ghostable is used when you need to save the file on the file system. For example, if you need to deploy a cutsom aspx page or a custom master page you can specify Ghostable like below

<file Url="default.aspx" Type="Ghostable">

Ghostableinlibrary is used when you have to deploy your stuff in library. For example deploying CSS, js files in Styles Library in SharePoint 2010. This gives you ability to check in\check out the files and use versioning as well. You can use it by

<file Url="StyleCSS.css" Type="Ghostableinlibrary">